
- Mt. Kailash Tour
- Kailash Mansarovar Overland Tour
- Kailash Mansarovar Yatra by Helicopter – Complete Spiritual Journey Guide
- Kailash Yatra via Lucknow
- Kailash Mansarovar Tour via Lhasa
- Kailash Lhasa EBC Tour From Beijing
- Kailash Heli Tour via Kerung: Complete Spiritual Journey Guide
- Kailash Tour via Lhasa In Kerung Out
- Lhasa EBC Kailash Tour
- Kailash Heli Tour
- Kailash Mansarovar Yatra from Nepal 2027: Cost & Itinerary
- Kailash Nandi Kora
- Kailash Tour via Humla Simikot – 20 Days
- Mount Kailash Tour: 7 Amazing Experiences in 2027
- Trekking
-
-
- Everest Region
- Luxury Everest Base Camp Trek: 7 Unforgettable Highlights
- Everest Base Camp Trek 2026: Cost, Route, and Complete Guide
- Everest Three Passes Trek 2027: Cost, Route & Itinerary
- Everest Base Camp Short Trek
- Everest Panorama Trek: Amazing 10-Day Cost & Itinerary
- Everest Base Camp Island Peak Trek: Complete 19-Day Guide
- Gokyo Valley Trekking 2027: Easy Guide to Cost & Itinerary
- Mera Peak Climbing 2027: Complete Cost & Itinerary Guide
- Rolwaling Valley Trek: 23-Day Itinerary, Cost, Permits & Difficulty
- Dolpo Region Trek
- Everest Region
-
- Annapurna Region
- Annapurna Base Camp Trekking
- Annapurna Circuit Trek
- Annapurna Base Camp Trek: 7 Amazing Cost & Route Tips
- Mardi Himal Trek: 7 Amazing Highlights & Complete Guide
- Annapurna Alternative Combine Trek: 18 Amazing Days
- Mohare Dada Trek
- Ghorepani Poon Hill Trek: 7 Unforgettable Highlights
- Khopra Ridge Community Trek: 13-Day Ultimate Adventure
- Damodar Kunda Trek: 10-Day Ultimate Sacred Adventure
- Upper Mustang Trek: 10 Amazing Sights : Ultimate Guide
- Jomsom Muktinath Trek: Amazing 12-Day Ultimate Guide
- Ghale Gaun Trek: 7 Amazing Reasons : Ultimate Guide
- Dhampus Sarangkot Trek: 7 Incredible Experiences
- Dhaulagiri Region
- Annapurna Region
-
-
- Tours
-
-
- Day Tours
- Rickshaw–a three-wheeler Tour
- Pharping Dakshinkali Day Tour: 7 Amazing Highlights
- Historical Tour: 7 Amazing Places to Explore
- Kathmandu Temple Tour: 7 Amazing Spiritual Places
- Nagarkot Tour
- Bhaktapur City Tour: 7 Amazing Places to Explore
- Kathmandu City Tour – Complete Heritage & Cultural Experience in Nepal
- Chandragiri Hill: A Scenic Himalayan Escape Near Kathmandu
- Chitlang Hiking
- Shivapuri to Sundarijal Day Hiking
- Kulekhani Dam Day Tour — Complete Travel Guide
- Day Tours
-
- Package Tours
- Mustang Tour on Jeep
- Nepal Tour Package for Nepali: 12 Amazing Destinations to Explore (2026)
- Muktinath Tour: Complete Guide to Nepal’s Sacred Himalayan Pilgrimage
- 3N,4D Kathmandu Pilgrimage Tour
- Nepal Buddhist Pilgrimage Tour: 7 Sacred Sites Not to Miss
- 6D Nepal Pilgrimage Tour: 7 Amazing Sacred Places
- 7 Nights, 8 Days Nepal Tour
- Districts tour of Nepal
- Janakpur Tour Package: Price, Family Tour & Travel Guide from Kathmandu 2026
- Short Hike in Nepal: 7 Best Easy Treks for Beginners
- Package Tours
-
-
- Outbound
-
- Activities
- Climbing
- Bungee Jumping in Nepal
- Heli Skiing Adventure in the Himalayas
- Canoeing in Nepal
- Mountain Flight in Nepal
- Zip Flyer in Pokhara: The Ultimate Adventure Experience
- Paragliding in Pokhara: 7 Amazing Reasons to Experience Nepal’s Best Adventure
- Kathmandu Cycling Tour: 9 Amazing Adventures
- Rafting
- Rock Climbing
- Company
- Travel Info
- Travel Insurance
- Recommended Medical Kit
- Nepal Visa Information
- Flight delays and cancellation in Nepal
- Electricity in Nepal: Rates, Bill Check, Calculator and NEA Services
- Trekking Equipment Checklist: 40 Essential Items
- Best Kailash season in Tibet
- Best Trekking season in Nepal
- Trekking in Nepal 2027: 15 Best Himalayan Adventures
- Blogs
- Contact


WhatsApp
+977-9851035239

Email Us
[email protected]
Trekking Equipment Checklist: 40 Essential Items
A reliable trekking equipment checklist can prevent unnecessary discomfort, reduce pack weight, and help you respond to sudden changes in mountain weather. Whether you are preparing for a short trek near Pokhara or a high-altitude journey in the Everest region, every item should serve a clear purpose.
The best trekking equipment checklist is not the one with the most gear. It is the one adapted to your destination, season, accommodation, altitude, and personal needs.
This guide covers clothing, footwear, bags, sleeping equipment, hydration, safety supplies, electronics, and important documents. It is designed for Himalayan teahouse trekking, but it can also be adjusted for camping and peak-climbing trips.
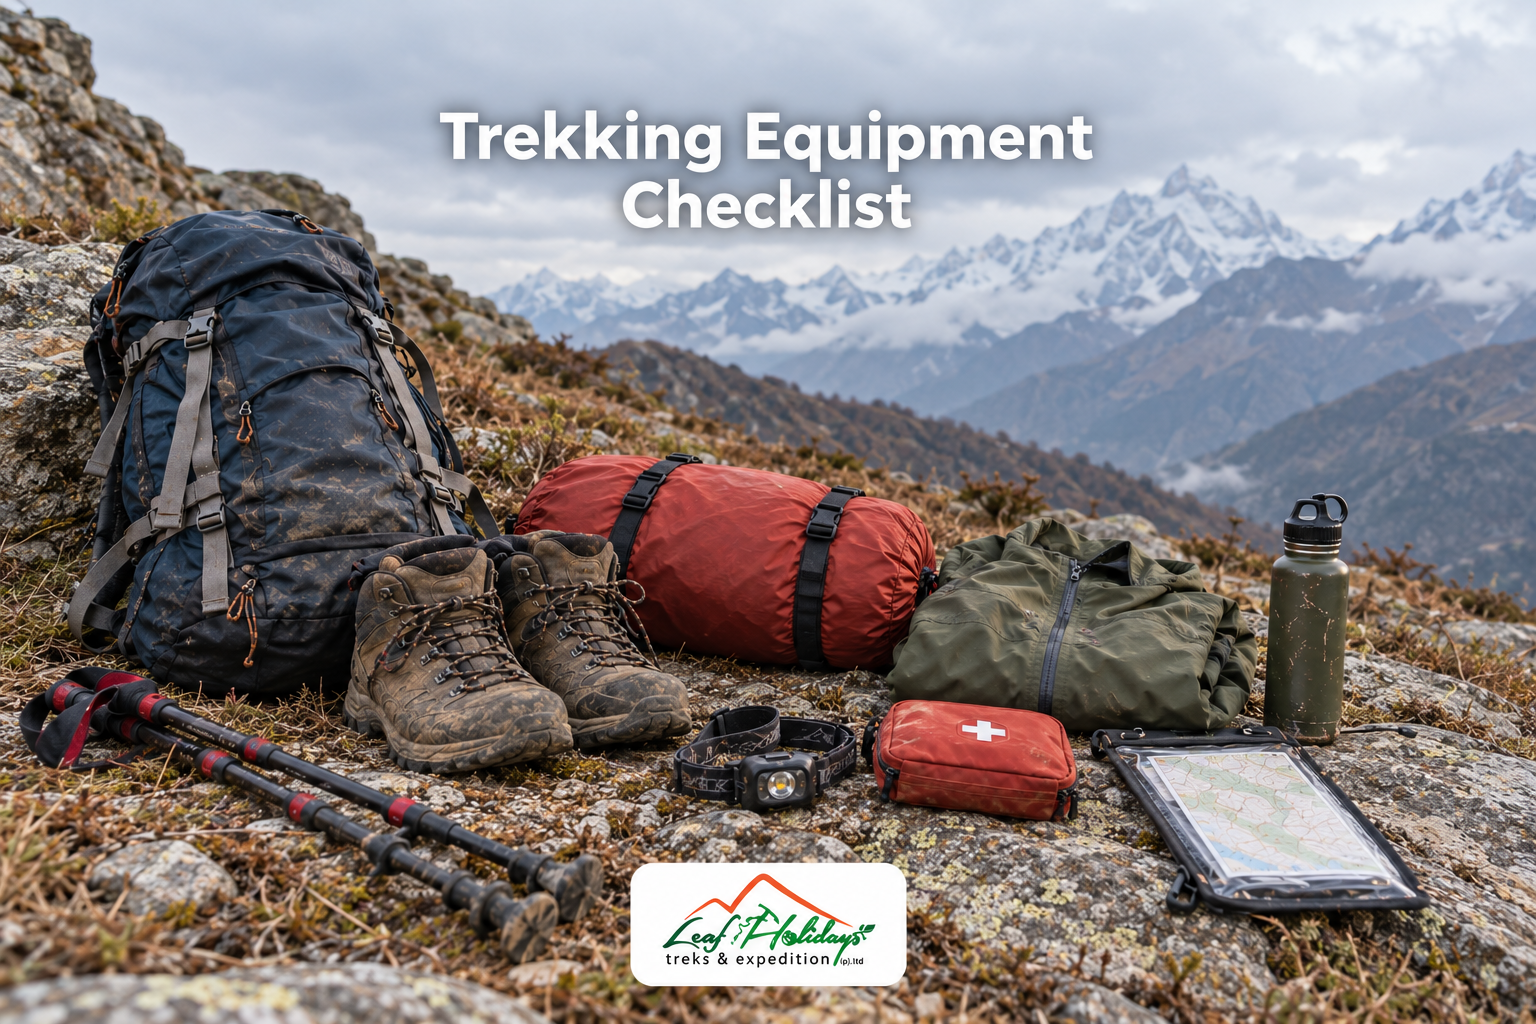
Complete Trekking Equipment Checklist
Use this table as your master packing list. Quantities are general recommendations for a multi-day teahouse trek and should be adjusted according to your itinerary and access to laundry services.
| No. | Equipment | Recommended quantity | Purpose |
|---|---|---|---|
| 1 | Waterproof trekking boots | 1 pair | Ankle support and protection on uneven trails |
| 2 | Lightweight camp shoes | 1 pair | Evening use inside and around teahouses |
| 3 | Moisture-wicking trekking socks | 3–4 pairs | Comfort and blister reduction |
| 4 | Warm wool or synthetic socks | 1–2 pairs | Cold mornings and high-altitude nights |
| 5 | Moisture-wicking underwear | 4–5 pairs | Hygiene and moisture management |
| 6 | Short-sleeved base-layer tops | 2–3 | Warm lower trails and layering |
| 7 | Long-sleeved thermal tops | 1–2 | Cold-weather insulation |
| 8 | Thermal leggings | 1–2 pairs | Base insulation for the legs |
| 9 | Trekking trousers | 2 pairs | Daily trail wear |
| 10 | Lightweight shorts | 1 pair | Optional for warmer lower regions |
| 11 | Fleece jacket | 1 | Lightweight mid-layer insulation |
| 12 | Insulated or down jacket | 1 | Cold evenings and high elevations |
| 13 | Waterproof and windproof jacket | 1 | Protection from rain, snow, and wind |
| 14 | Waterproof over-trousers | 1 pair | Protection during rain or snowfall |
| 15 | Sun hat or cap | 1 | Sun protection |
| 16 | Warm wool or fleece hat | 1 | Heat retention in cold conditions |
| 17 | Neck gaiter or scarf | 1–2 | Protection from wind, cold, and dust |
| 18 | Lightweight inner gloves | 1 pair | Basic warmth and dexterity |
| 19 | Insulated waterproof gloves | 1 pair | Protection in cold, snow, and wind |
| 20 | UV-protective sunglasses | 1 pair | Protection from sunlight and snow glare |
| 21 | Backpack or daypack | 1 | Carrying daily essentials |
| 22 | Backpack rain cover | 1 | Protecting the daypack from moisture |
| 23 | Duffel bag | 1 | Porter-carried clothing and equipment |
| 24 | Dry bags or packing cubes | 3–5 | Organizing and waterproofing equipment |
| 25 | Cold-weather sleeping bag | 1 | Warmth in mountain lodges or tents |
| 26 | Sleeping bag liner | 1 | Additional warmth and hygiene |
| 27 | Trekking poles | 1 pair | Balance and reduced knee strain |
| 28 | Headlamp | 1 | Hands-free lighting |
| 29 | Spare headlamp batteries | 2 sets | Backup lighting power |
| 30 | Reusable water bottles | 2 × 1 liter | Maintaining water capacity |
| 31 | Water-purification treatment | Trip supply | Treating water during the trek |
| 32 | Sunscreen | 1 bottle | UV protection |
| 33 | SPF lip balm | 1–2 | Preventing dry or sunburned lips |
| 34 | Personal first-aid kit | 1 kit | Treating minor injuries and blisters |
| 35 | Personal medication | As prescribed | Individual medical requirements |
| 36 | Toiletry kit | 1 compact set | Personal hygiene |
| 37 | Quick-drying towel | 1 | Washing and shower use |
| 38 | Power bank | 1 | Charging essential electronics |
| 39 | Phone or camera | 1 | Communication, navigation, and photography |
| 40 | Waterproof document pouch | 1 | Protecting permits, passports, and insurance |
Why a Trekking Equipment Checklist Matters
Mountain conditions can change quickly. A warm morning at a low elevation can become windy and cold as the trail climbs. Rain, snowfall, strong sun, and freezing nighttime temperatures can occur within the same journey.
The U.S. National Park Service recommends carrying essential outdoor safety items, including navigation, insulation, illumination, first-aid supplies, sun protection, food, and water. It also advises packing an extra clothing layer suitable for the most extreme conditions likely to be encountered. nps.gov
A carefully prepared checklist helps you:
- Avoid forgetting essential equipment
- Control the weight of your luggage
- Separate personal and porter-carried items
- Prepare for unexpected weather
- Reduce unnecessary purchases
- Check equipment before departure
- Identify items that can be rented
- Keep important documents protected
Your equipment supports safety, but it cannot replace fitness, acclimatization, professional guidance, or sound decision-making.
Trekking Footwear Checklist
Waterproof Trekking Boots
Trekking boots are among the most important items on your checklist. Choose boots with:
- Supportive soles
- Reliable grip
- Enough ankle support
- Space for thicker socks
- Water-resistant or waterproof construction
- A comfortable fit without heel movement
The National Park Service recommends sturdy, rubber-soled hiking footwear for dirt and gravel trails. nps.gov
Never begin a long Himalayan trek in brand-new boots. Wear them during training hikes until they feel comfortable over several consecutive hours.
Trekking Socks
Carry a combination of moisture-wicking trekking socks and warmer socks. Synthetic or wool socks generally manage moisture better than ordinary cotton socks.
Keep one dry pair specifically for sleeping. Changing into clean, dry socks after reaching the lodge can improve comfort and help keep your sleeping bag clean.
Camp Shoes
Lightweight camp shoes, sandals, or slip-on shoes allow your feet to rest after trekking. They are also practical inside teahouses and during nighttime bathroom visits.
Avoid carrying heavy spare footwear unless the route requires it.
Trekking Clothing Checklist
Use a Layering System
A good layering system is more effective than relying on one extremely heavy item. Layers allow you to adjust clothing as your body temperature and the weather change.
The system normally includes:
- Base layer
- Insulating mid-layer
- Outer weatherproof layer
Base Layers
The base layer sits directly against the skin. It should move moisture away from your body and dry quickly.
Suitable materials include:
- Merino wool
- Polyester
- Nylon blends
- Technical synthetic fabrics
Avoid relying on cotton in cold or wet conditions because it absorbs moisture and dries slowly. National Park Service guidance recommends quick-drying materials such as wool, fleece, polypropylene, and nylon for changing outdoor conditions. Olympic National Park (U.S. …
Mid-Layers
A fleece or lightweight insulated jacket provides warmth while remaining breathable. During active walking, a heavy down jacket may feel too warm, making a fleece more practical.
Carry one dependable mid-layer rather than several bulky sweaters.
Down or Insulated Jacket
A warm insulated jacket is essential for high-altitude teahouse treks. Temperatures can drop quickly after sunset, and lodge dining rooms may not remain heated throughout the evening.
Choose a jacket that fits comfortably over your base and mid-layers.
Waterproof Outer Shell
Your outer shell should block rain, snow, and strong wind. Select a jacket with:
- Waterproof material
- Adjustable hood
- Secure front closure
- Ventilation where possible
- Enough room for insulation underneath
Waterproof trousers are particularly useful during monsoon, winter, and high-pass treks.
Hand, Head, and Eye Protection
Sun Hat and Warm Hat
Carry both a sun hat and a warm hat. The sun hat protects the face and neck during exposed daytime walks, while the insulated hat helps retain heat during cold mornings and evenings.
Inner and Outer Gloves
A two-layer glove system provides greater flexibility:
- Lightweight gloves for ordinary cold conditions
- Insulated waterproof gloves for wind, snow, and higher elevations
UV-Protective Sunglasses
High-altitude sunlight can be intense, especially when reflected from snow. Choose sunglasses with reliable ultraviolet protection.
For snow-covered trails or glacier travel, use glasses designed to block strong side light. Ordinary fashion sunglasses may not provide enough coverage.
Neck Gaiter
A neck gaiter protects against cold air, sun, and dust. It is lightweight and can also be used as a face covering, headband, or emergency hat.
Bags and Luggage
Daypack
Your daypack should normally carry the items you need while walking:
- Water
- Waterproof jacket
- Warm layer
- Sun protection
- Snacks
- Camera or phone
- Personal medication
- First-aid items
- Documents
- Headlamp
Choose a pack with comfortable shoulder straps, a supportive hip belt, and enough space for daily essentials. An oversized daypack encourages unnecessary packing.
Duffel Bag
On supported treks, a porter may carry your main duffel bag. Pack clothing, camp shoes, sleeping equipment, and non-essential daytime items inside it.
Confirm the operator’s porter-weight limit before departure. Do not assume that every bag can be carried regardless of weight.
Rain Cover and Dry Bags
A rain cover protects the outside of your backpack but may not keep everything completely dry. Store sensitive items inside waterproof dry bags or sealed pouches.
Prioritize waterproof protection for:
- Passport
- Permits
- Insurance documents
- Electronics
- Medication
- Down jacket
- Sleeping clothes
- Spare socks
Packing cubes can separate clean clothing from used clothing while keeping the bag organized.
Sleeping Equipment
Sleeping Bag
Choose your sleeping bag according to season, route, and maximum sleeping elevation. A bag suitable for a low-altitude spring trek may not provide enough warmth for an autumn journey above 4,000 metres.
Do not rely only on the temperature printed on the label. Comfort ratings, personal cold tolerance, and sleeping conditions matter.
A sleeping bag should be:
- Warm enough for the expected nighttime temperature
- Light enough to transport
- Clean and completely dry
- Suitable for use inside teahouses or tents
- Easy to compress without damaging the insulation
Sleeping-Bag Liner
A sleeping-bag liner improves hygiene and adds a small amount of warmth. It is useful when lodge blankets are provided but their cleanliness or condition is uncertain.
Trekking Poles
Trekking poles improve balance on loose stones, river crossings, snow and steep descents. They can also reduce stress on the knees during long downhill sections.
Adjust the pole length for the terrain:
- Slightly shorter during ascent
- Slightly longer during descent
- Equal and balanced on flatter ground
Practise using both poles before the trek. Poor technique may make them feel inconvenient instead of helpful.
Headlamp and Lighting
A headlamp is safer and more practical than relying on a phone flashlight. It keeps both hands free during:
- Early departures
- Late lodge arrivals
- Nighttime bathroom visits
- Power cuts
- Emergency situations
The National Park Service describes a headlamp as a preferred outdoor light source because it provides hands-free illumination and recommends carrying spare batteries. nps.gov
Keep one complete spare set of batteries in a waterproof pouch.
Water Bottles and Purification
Carry enough bottle capacity for the route between reliable water sources. Two one-litre bottles provide flexibility and are easier to manage than one oversized container.
Do not assume that clear mountain water is safe to drink. The CDC recommends boiling as the most reliable method for killing germs. When boiling is not practical, filtering followed by disinfection provides stronger protection than either step alone. cdc.gov
Possible treatment methods include:
- Boiling
- Water filter
- Purification tablets
- Chlorine dioxide drops
- Filter and chemical-treatment combination
Follow the product instructions carefully, especially the required treatment time.
A reusable bottle also reduces dependency on disposable plastic.
Sun and Skin Protection
UV exposure becomes more intense at higher elevations. Your trekking equipment checklist should contain:
- Broad-spectrum sunscreen
- SPF lip balm
- UV-protective sunglasses
- Sun hat
- Long-sleeved layer
Apply sunscreen before beginning the day and reapply it during extended exposure. Do not forget commonly missed areas such as the ears, neck, nose and hands.
Cold wind can also dry the skin, so a small moisturiser may be useful.
First-Aid and Personal Medication
A personal first-aid kit should be compact and focused on realistic trekking problems.
Useful supplies include:
- Adhesive bandages
- Blister treatment
- Moleskin
- Antiseptic wipes
- Sterile gauze
- Medical tape
- Elastic bandage
- Pain relief medication
- Oral rehydration salts
- Personal prescriptions
- Hand sanitiser
Your trekking team may carry a group medical kit, but you remain responsible for personal medication.
Keep medication in its original packaging where practical and carry a copy of the prescription for important medicines.
Altitude Medication
Do not begin altitude medication without appropriate medical advice. Medication does not replace gradual ascent or acclimatization.
The Nepal Tourism Board advises that illness above 2,500 metres may represent acute mountain sickness until proven otherwise. Early symptoms can include headache, reduced appetite, nausea, fatigue and dizziness. NTB
The CDC also warns that even standard itineraries on some Nepal trekking routes can place travellers under considerable acclimatization pressure. cdc.gov
If symptoms worsen, inform the guide and stop ascending.
Toiletries and Hygiene Supplies
Pack only compact personal-care products.
A practical toiletry kit may contain:
- Toothbrush and toothpaste
- Biodegradable soap
- Hand sanitiser
- Wet wipes
- Toilet paper
- Quick-drying towel
- Menstrual products
- Nail clippers
- Small moisturiser
- Personal hygiene products
Carry used wipes, wrappers and sanitary products out of the mountains where suitable disposal is unavailable.
Leave No Trace principles recommend planning ahead, staying on durable surfaces and packing waste out rather than leaving it beside the trail. LNT.org
Electronics Checklist
Mobile Phone
A phone can serve several purposes:
- Communication where a network is available
- Offline maps
- Camera
- Notes
- Digital documents
- Emergency information
Download maps and essential documents before entering remote areas.
Power Bank
Electricity is available at many teahouses, but charging may be limited or subject to an additional fee. Cold temperatures also reduce battery performance.
Keep power banks, camera batteries and your phone inside your sleeping bag or jacket during extremely cold nights.
Camera Equipment
If carrying a camera, include only the lenses and accessories you expect to use. Heavy camera equipment quickly increases daypack weight.
Bring:
- Spare batteries
- Memory cards
- Lens cloth
- Waterproof pouch
- Suitable charging cable
Documents and Money
Keep original documents and copies protected inside a waterproof pouch.
Important items may include:
- Passport
- Nepal visa documentation
- Trekking permits
- Travel insurance certificate
- Emergency contact details
- Medical information
- Passport-size photographs
- Flight confirmation
- Local currency
- Bank card
Remote settlements may not have reliable card services or ATMs. Keep cash divided between two secure locations rather than carrying everything in one wallet.
Route-Specific Equipment Adjustments
One packing list cannot suit every Nepal trekking route. Modify your equipment according to altitude, terrain and season.
Everest Base Camp Equipment
An Everest Base Camp trekking packing list should prioritize:
- Warm insulated jacket
- Cold-weather sleeping bag
- Thermal base layers
- Insulated gloves
- UV-protective sunglasses
- Water-purification method
- Spare batteries
- Reliable trekking boots
A rushed Everest Base Camp short trek does not justify packing less safety equipment. Reduced itinerary length does not remove cold, sun exposure or altitude risk.
Annapurna Base Camp Equipment
The Annapurna Base Camp Trek passes through forest, river valleys and higher alpine terrain. Pack for changing temperature and moisture conditions.
Waterproof clothing, trekking poles and quick-drying layers are particularly useful.
Gokyo Valley Equipment
The Gokyo Valley Trekking route reaches cold and exposed high-altitude areas. Warm gloves, a down jacket, UV-protective sunglasses and a suitable sleeping bag should be priorities.
Manaslu Circuit Equipment
The Manaslu Circuit Trek Nepal crosses remote terrain and a high mountain pass. Carry dependable cold-weather clothing, trekking poles and waterproof storage.
Packing should allow for basic facilities and possible weather-related changes.
Mardi Himal Equipment
The Mardi Himal Trek is shorter, but the ridge and High Camp can still become cold and windy. Do not leave behind your down jacket or waterproof shell simply because the itinerary has fewer days.
Peak-Climbing Equipment
A trekking equipment checklist is not sufficient for a climbing expedition. Trips such as Mera Peak Climbing require additional technical items, including:
- Mountaineering boots
- Crampons
- Harness
- Helmet
- Ice axe
- Jumar
- Descender
- Carabiners
- Climbing gloves
- Gaiters
Technical climbing gear should be checked by a qualified climbing guide.
Seasonal Trekking Equipment Checklist
Spring: March to May
Spring conditions become warmer as the season progresses, but cold and snow may remain at high elevations.
Add:
- Warm layers
- Waterproof shell
- Light gloves
- Sun protection
- Gaiters for snowy sections where required
Monsoon: June to August
Monsoon requires strong moisture protection.
Add:
- Reliable rain jacket
- Waterproof trousers
- Backpack rain cover
- Dry bags
- Quick-drying clothing
- Gaiters
- Extra socks
- Insect repellent for lower elevations
Autumn: September to November
Autumn usually brings stable trekking conditions, but nights become colder later in the season.
Add:
- Down jacket
- Thermal layers
- Warm gloves
- Cold-weather sleeping bag
- Lip protection
- Moisturiser
Winter: December to February
Winter requires a more serious cold-weather setup.
Add:
- Heavier insulated jacket
- Warmer sleeping bag
- Multiple thermal layers
- Insulated waterproof gloves
- Gaiters
- Face covering
- Microspikes where recommended for the specific route
Check current trail and pass conditions before carrying or using traction equipment.
What Not to Pack
Unnecessary equipment increases porter loads and makes personal bags difficult to manage.
Avoid packing:
- Several pairs of heavy trousers
- Multiple bulky sweaters
- Large toiletry bottles
- Excessive camera equipment
- Valuable jewellery
- Formal clothing
- Heavy hard-shell suitcases
- Cotton clothing for cold trekking days
- Unnecessary electronics
- Too many books
- Large quantities of packaged snacks
Pack for function rather than appearance. A few well-selected layers can replace several bulky garments.
How to Reduce Pack Weight
Lay everything out before packing and remove items that do not serve a clear purpose.
Use these practical rules:
- Choose layers that work together
- Carry quick-drying clothing
- Use one item for multiple purposes
- Transfer liquids into small containers
- Coordinate shared items with your trekking team
- Rent technical gear when appropriate
- Wear heavier clothing during transit
- Avoid duplicate electronics
- Follow the porter-weight limit
- Keep your daypack light enough for daily walking
Test the packed daypack during training. If it feels uncomfortable during a short walk at home, it will feel worse after several hours on a mountain trail.
Trekking Equipment Checklist PDF
This master list can be converted into a trekking equipment checklist PDF from your browser:
- Open the completed article.
- Select the print option.
- Choose “Save as PDF.”
- Save the file to your phone.
- Print a copy and tick each item while packing.
Before saving the checklist, personalise it with:
- Trek name
- Travel dates
- Maximum altitude
- Expected season
- Luggage allowance
- Porter weight limit
- Rental equipment
- Personal medication
- Emergency contacts
A personalised PDF is more useful than a generic list because it reflects the conditions of your actual journey.
Final Equipment Check Before Departure
Complete your final check at least two days before departure.
Confirm that:
- Boots are broken in
- Waterproof layers have been tested
- Sleeping bag is warm enough
- Batteries and power bank are charged
- Medication is complete
- Documents are protected
- Water-treatment products are usable
- Headlamp is working
- Sunglasses provide UV protection
- Bags remain within weight limits
- Rental equipment fits correctly
- Emergency contacts are accessible
If you are uncertain about seasonal equipment or rental gear, contact Leaf Holidays before travelling.
Conclusion
A successful trek begins before you step onto the trail. The right trekking equipment checklist keeps your luggage organised, supports comfort and prepares you for changing mountain conditions.
Focus on layering, reliable footwear, water treatment, sun protection, first aid and waterproof storage. Adjust every item according to the trek, season, accommodation and maximum altitude.
The best trekking equipment checklist should make your journey safer and simpler—not make your bag unnecessarily heavy.
Frequently Asked Questions
What equipment is essential for trekking?
The essential items include supportive trekking boots, layered clothing, waterproof outerwear, a sleeping bag, trekking poles, headlamp, water bottles, purification treatment, sun protection and a first-aid kit.
How many clothes should I carry for a two-week trek?
Two trekking trousers, two or three base-layer tops, one or two thermal sets and three or four pairs of trekking socks are generally sufficient. Choose quick-drying clothing and reuse outer layers.
Should I bring a down jacket?
A down or synthetic insulated jacket is strongly recommended for high-altitude trekking. Even during warmer seasons, mornings, evenings and exposed areas can become cold.
What sleeping bag is suitable for Nepal?
The required sleeping-bag rating depends on season, route and maximum sleeping altitude. Confirm expected nighttime temperatures with your trekking company before choosing one.
Can I rent trekking equipment in Kathmandu?
Yes. Sleeping bags, down jackets, trekking poles and some technical equipment can be rented. Inspect the condition, cleanliness and fit before accepting rented items.
Do I need waterproof trekking boots?
Waterproof boots are useful for snow, rain, mud and wet trails. More importantly, the boots must fit correctly, provide suitable grip and be broken in before departure.
Are trekking poles necessary?
They are not compulsory on every route, but they improve balance and can reduce strain on the knees during steep descents.
How much water should I carry?
Carrying capacity of approximately two litres is practical for many routes. The amount required depends on weather, altitude and distance between safe water sources.
Can I drink water directly from mountain streams?
Untreated water should not be assumed safe. Boil, filter or disinfect water properly before drinking it.
What should I keep in my daypack?
Carry water, waterproof clothing, a warm layer, snacks, sun protection, medication, first-aid supplies, documents, headlamp and essential electronics.
How heavy should my trekking bag be?
The ideal weight depends on whether you carry everything yourself or use a porter. Keep the daypack limited to daily essentials and confirm the operator’s duffel-weight allowance.
Do I need technical climbing equipment?
Ordinary trekking routes do not normally require technical climbing equipment. Peak-climbing journeys require specialist gear and guidance from a qualified climbing professional.

- Terms & Conditions
- Best Trekking season in Nepal
- Travel Insurance
- Nepal Visa Information
- Flight delays and cancellation in Nepal
- Electricity in Nepal: Rates, Bill Check, Calculator and NEA Services
- Trekking Equipment Checklist: 40 Essential Items
- Best Kailash season in Tibet
- Trekking in Nepal 2027: 15 Best Himalayan Adventures
- Recommended Medical Kit

Need Help?
Ask to Travel Expert